Introduction: Safety-First Basics for Denver Chimneys
Denver’s high-altitude climate, with its intense sun, rapid temperature swings, and freeze–thaw cycles, can be hard on masonry, metal, and sealants. If you are planning to handle minor fixes yourself, a careful, safety-first approach will help you protect your home and keep smoke moving the way it should. This guide focuses on basic tasks a handy homeowner can take on with the right preparation, including mortar touch-ups, crown sealing, cap replacement, and light flashing maintenance. For larger structural issues or anything beyond your comfort level, do not hesitate to involve professionals. When you need guidance on materials, techniques, or a second opinion, a trusted local partner in chimney repair can help you understand options that fit Denver’s unique conditions.
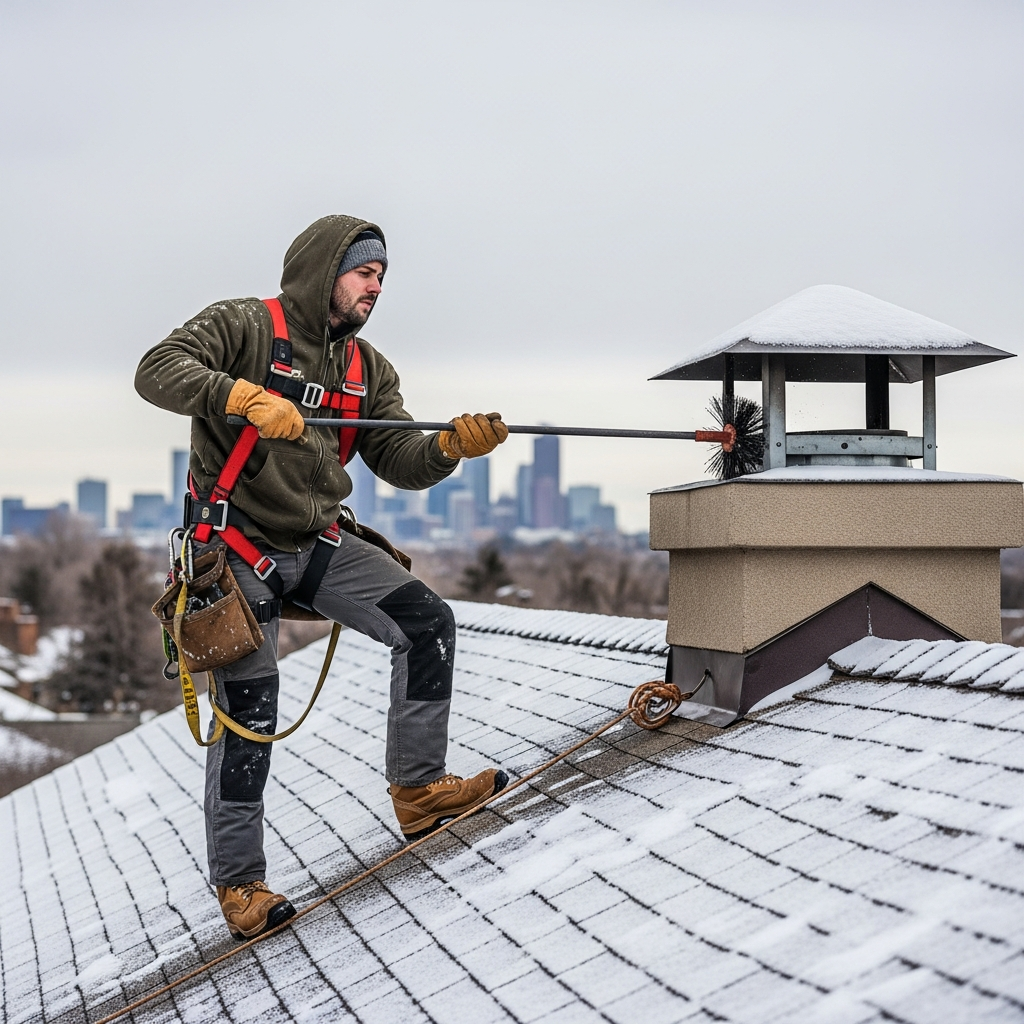
Before you lift a tool, make safety your top priority. Working on a roof introduces fall risks, and soot exposure and sharp metal edges can create hazards. Wear a hard hat, non-slip shoes, gloves, and eye protection. Use fall protection where appropriate, and never climb a ladder that is not stable. Wait for fair weather; wind gusts travel fast along the Front Range, and rain or snow makes surfaces slick. Finally, confirm that your fireplace and flue are cool and not in use. Even embers can create an unsafe environment for coats, tarps, or sealants.
Know Your Chimney Components
Identifying what you are looking at will make every repair easier. The crown or wash is the top concrete or mortar layer that sheds water away from the flue. The cap is the metal assembly that typically includes a spark arrestor and a hood to keep out rain and wildlife. The flue is the inner passage for smoke, lined with clay tiles or a metal liner. The chimney stack is the visible masonry structure, and the flashing is the sheet metal that seals the seam where the chimney meets the roof. Each of these parts must work together to keep water out, channel exhaust safely, and resist Denver’s ultraviolet exposure and freeze–thaw stress.
Tools and Materials for Basic Repairs
For mortar touch-ups and crown sealing, gather a cold chisel, a masonry brush, a tuckpointing trowel, mortar or patching compound rated for exterior chimneys, and a crown sealer formulated for freeze–thaw climates. For cap and light flashing work, have a nut driver or screwdriver, sheet-metal screws, roof-rated sealant, and a snip for minor metal trimming. Keep a shop vacuum handy for dust and debris, but avoid using it inside the flue unless you have the proper filtration. As a rule, select materials that specify exterior, high-temperature, or chimney-rated performance. General-purpose indoor products often fail prematurely in Denver’s sun and temperature swings.
Step-by-Step: Mortar Joint Touch-Ups
Mortar joints between bricks can crack or erode over time, permitting water entry that leads to spalling and further damage. If the damage is shallow and localized, you can perform basic tuckpointing. Start by clearing weak mortar with a cold chisel and a hammer, tapping gently to avoid widening the joint unnecessarily. Brush out dust and rinse lightly if the manufacturer allows; many modern repair mortars set better on a clean, slightly damp substrate. Mix your patching mortar to the recommended consistency, and work it into the joint with your tuckpointing trowel. Pack the joint fully, smoothing the surface so water sheds rather than collects. Allow the repair to cure according to the product instructions, protecting it from precipitation and direct sun if required.
Denver’s daytime heat can dry mortar too quickly, and overnight lows can drop suddenly. Try to work when temperatures are within the acceptable range for your material. If the sun is intense, create shade with a temporary screen, and avoid adding water beyond the mix ratios to counteract drying. Proper curing is essential to longevity; many failures trace back to improper moisture management during curing rather than to the product itself.
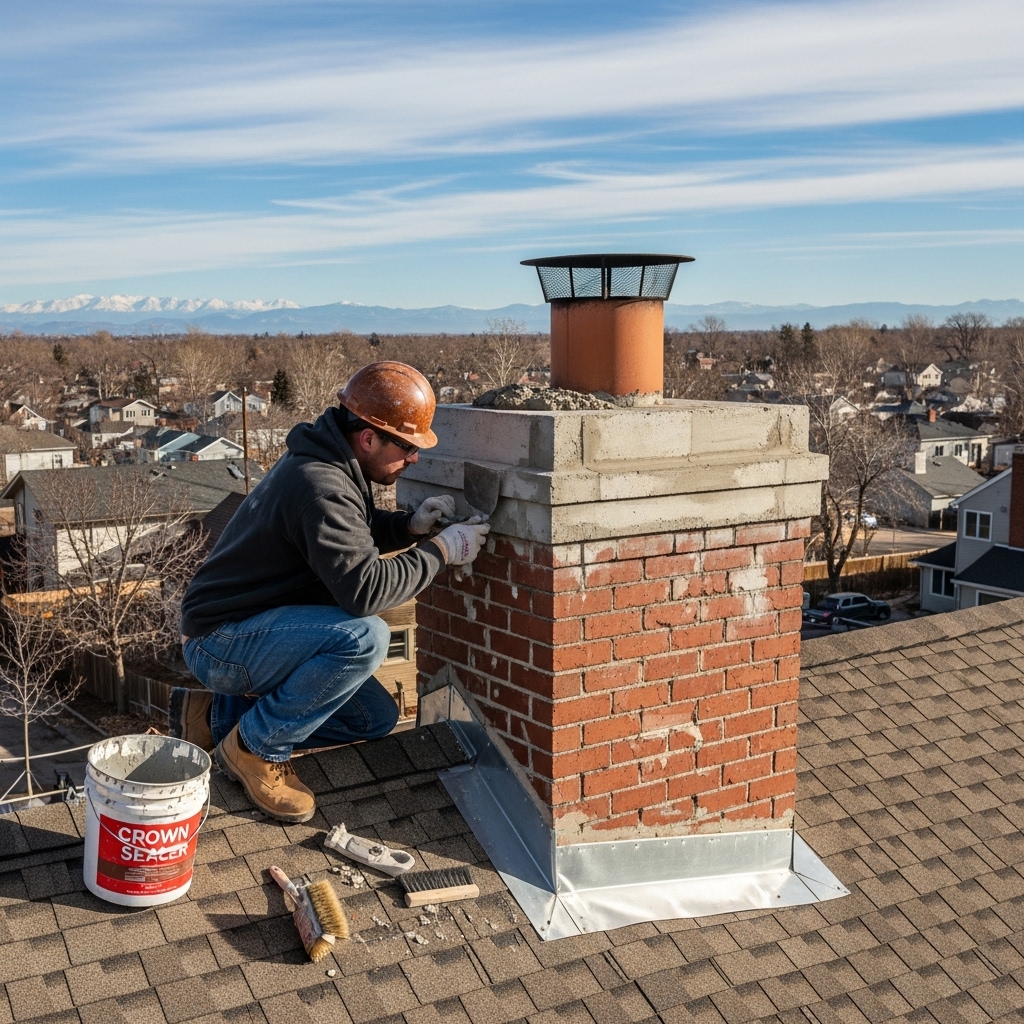
Step-by-Step: Crown Sealing
The crown sheds water away from the flue and outer masonry. Even small cracks can let water in, which expands when frozen and worsens the damage. First, inspect the crown for hairline cracks, gaps around the flue tile, or areas where water ponds. Clean the surface thoroughly; dirt, soot, and moss impair adhesion. If you see large structural fractures or rebar exposure, stop and call a pro. For hairline or small cracks, apply a chimney-rated crown sealer with a brush, working it into the cracks and feathering the edges to maintain drainage. Pay special attention to the juncture where the crown meets the flue tile; a flexible, high-temperature sealant may be specified there by the product manufacturer.
Freeze–thaw conditions demand a product that remains flexible and waterproof. Many sealers require two coats, applied perpendicular to each other for coverage. Respect the cure time before exposing the crown to rain or snow. After curing, pour a small amount of water on the crown; it should bead up and flow away from the flue. If it soaks in or pools, reassess the application and slope.
Step-by-Step: Cap Replacement and Maintenance
Caps keep out rain, reduce downdrafts, intercept sparks, and deter wildlife. If your cap is missing, corroded, or loose, replacement is typically straightforward. Measure your flue tile or liner as precisely as possible; many caps secure with screws on the sides of the tile or with legs that anchor inside the flue. Remove the old cap by loosening fasteners and lifting straight up. Use caution with sharp edges and rusted hardware. Clean debris from the flue opening, avoid dropping anything inside, and fit the new cap per the manufacturer’s instructions. Tighten fasteners evenly, ensuring the cap sits level and secure. Confirm that the mesh is intact; Denver’s dry climate and gusty winds can carry embers farther than you might expect, so a good spark arrestor mesh is critical.
If you have a multi-flue chimney or a cap integrated into a chase cover, it may be safer to call a professional due to the added weight and complexity. For metal chase covers on factory-built chimneys, look for oil canning, rust, or lifted seams, and use a roof-rated sealant to touch up small gaps until a proper replacement is scheduled.
Step-by-Step: Light Flashing Maintenance
Flashing prevents roof leaks at the chimney intersection. Because Denver sees strong sun and wide temperature swings, sealants can dry out and crack. Start with a close inspection of step flashing, counterflashing, and any saddle or cricket behind wider chimneys. If you see small gaps where counterflashing meets masonry, clean the area and apply a thin bead of roof-rated sealant designed for metal and masonry interfaces. Press it in gently with a gloved finger and smooth the bead so water cannot catch on an edge.
Avoid relying on sealant as a primary fix for major flashing failures. If flashing has separated, if shingles are deteriorated, or if you see evidence of water inside the attic, schedule a comprehensive repair. Roofing and flashing are integrated systems; a quick smear of sealant is only a stopgap to protect against incoming weather.
Mid-Project Check: Venting and Draft
Once you have completed small repairs, confirm that airflow remains stable. Denver’s elevation reduces available oxygen, and cold mornings can produce downdrafts. Make sure the damper operates smoothly and the cap mesh is clear. If you notice a smoky smell, stains, or soot around the firebox after a test fire, stop and reassess your work. A smoke pencil, incense stick, or even a cool-day test with a small piece of rolled newspaper can help you visualize draft. If symptoms persist, consider a professional inspection and, if appropriate, an evaluation for liner integrity and sizing.
At this point in a typical project, many homeowners choose to consult a local expert to verify workmanship and catch any issues that are easy to miss from the roof. If you want an extra layer of confidence, reach out to a trusted resource in chimney repair who understands the effects of Denver’s climate on masonry, liners, and caps. Collaboration at the midpoint can prevent a small oversight from becoming a larger problem during the next storm cycle.
Weather Windows and Seasonal Timing
Plan repairs for dry stretches. Spring and early fall often offer stable temperatures without summer’s intense UV or winter’s snow. If you must work in summer, start early to avoid hot roof surfaces. In winter, focus on indoor planning and inspections, then schedule exterior work for safe, dry days. Keep in mind that some coatings require minimum temperatures to cure, so read labels carefully and do not rush the process.
Common Mistakes to Avoid
Do not fill deep cracks with surface sealers; prep and pack them with compatible mortar first. Do not over-tighten cap screws on clay tiles; excessive pressure can crack the tile. Do not block flue openings with temporary coverings during curing, and never operate the fireplace until all products have cured. Do not treat flashing sealant as a substitute for correctly lapped metal. Most importantly, do not work on a roof alone. Have a helper stabilize the ladder, hand up tools, and call for help if needed.
Long-Term Care After Basic Repairs
After you complete patching, sealing, and cap work, adopt a simple annual routine. Inspect the crown and cap mesh for damage every spring, clear pine needles and leaves after wind events, and watch the attic or top-floor ceilings near the chimney for water staining. Schedule sweeping and a level-appropriate inspection before the heating season. Denver’s dry air can mask minor leaks until a snowmelt event reveals them, so vigilance pays off.
Frequently Asked Questions
How do I know if my chimney crown needs attention? Look for hairline cracks, crumbling edges, or staining on the masonry below the crown. Pooled water on top is another red flag that slope is inadequate.
Can I use generic mortar mix for outdoor chimney joints? Use a mortar designed for exterior or chimney applications, and respect the temperature and curing guidelines. Denver’s climate punishes generic mixes that are not formulated for freeze–thaw cycles.
Is a chimney cap really necessary in a dry climate? Yes. Caps reduce water entry during snow and rain, block animals, and help manage sparks in windy conditions common along the Front Range.
What if I smell smoke in the house after repairs? Stop using the fireplace and investigate draft, damper position, and cap obstructions. If the issue persists, call a professional to evaluate the flue and liner.
Can I seal flashing with any roof caulk? Choose a product rated for metal-to-masonry joints and for UV exposure. The wrong sealant may harden and crack quickly.
How often should I inspect the chimney in Denver? Inspect visually every spring and fall, and have a professional sweeping and inspection before the primary burning season each year.
When is a DIY repair not appropriate? Structural cracks, leaning stacks, missing liners, and persistent water leaks beyond simple sealant touch-ups call for a professional assessment.
Final Safety Review
Before declaring the work complete, review a short checklist: Are all tools removed from the roof? Are fasteners snug but not overtightened? Did the crown sealer cure per the manufacturer’s schedule? Is the cap level and the mesh intact? Have you documented the repairs with photos for your home records? A careful wrap-up ensures the next storm or cold snap does not reveal an avoidable oversight.
Ready for a Safer, Stronger Chimney
If your goal is a safe, well-sealed, and reliable fireplace system, basic repairs combined with steady maintenance will make a real difference. When you want knowledgeable help tailored to Denver’s climate and building practices, connect with local specialists in chimney repair to plan inspections, targeted upgrades, and long-term protection that keeps smoke moving out and moisture locked out.