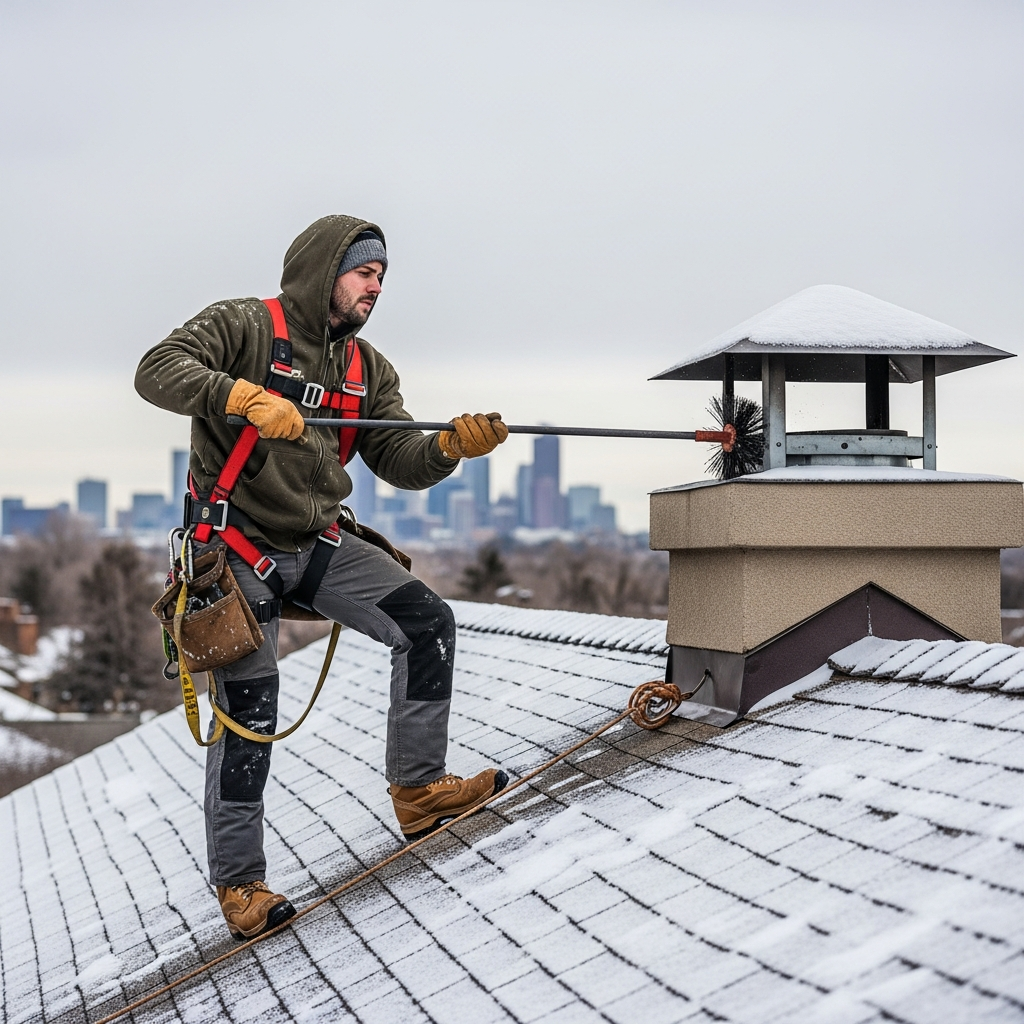
If there’s one detail that makes or breaks a watertight roof-to-chimney transition in Denver, it’s flashing. I’ve seen tiny gaps turn into stained ceilings, swollen trim, and even damaged framing after a few intense storms. Our city’s wind and freeze-thaw cycles test every seam, so flashing repairs have to be designed and executed with those forces in mind. The good news is that when step flashing and counterflashing are done properly—and supported by a sound crown, cap, and roofing integration—leaks stop, period. If you’re seeing water spots or suspect a roofline issue, getting focused, expert chimney repair is the smartest move you can make.
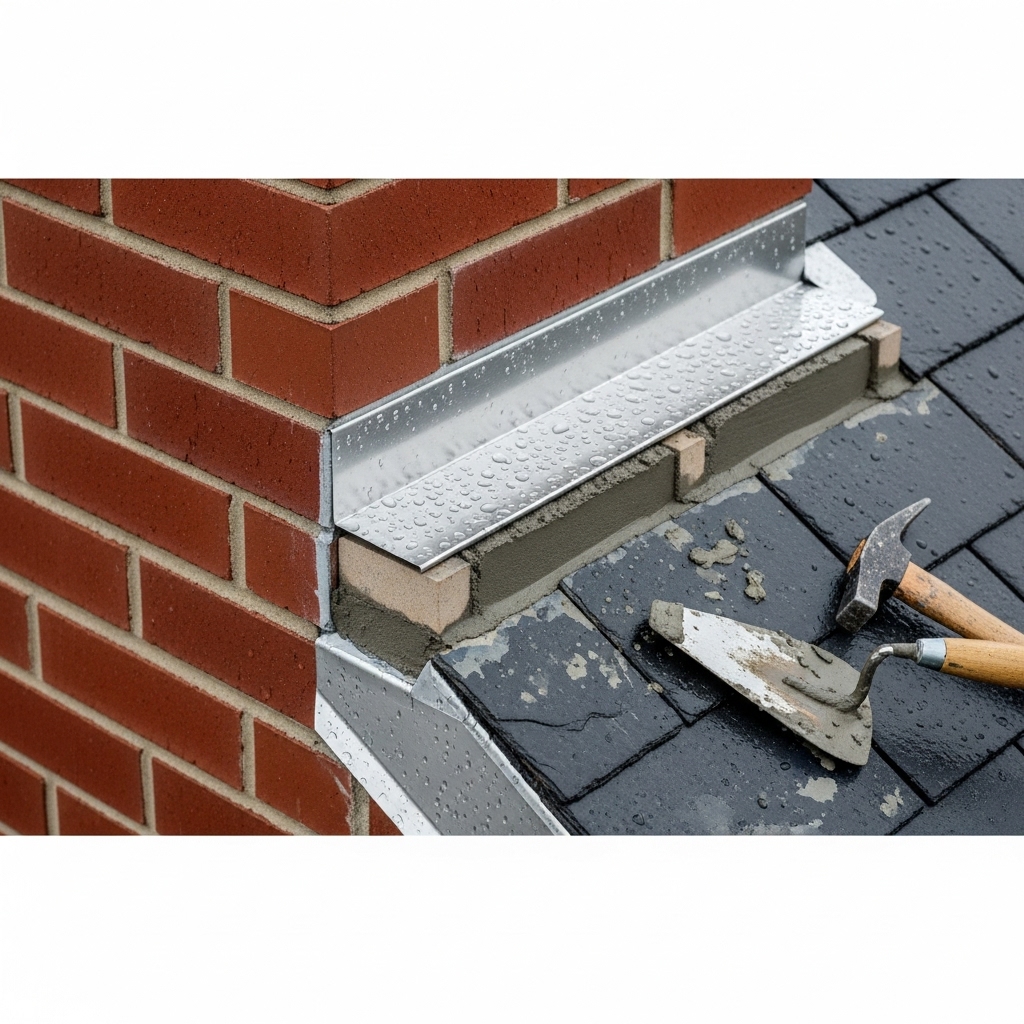
Flashing is often misunderstood because it’s partially hidden and can be mistaken for a caulk line. In reality, it’s a metal system installed in layers. Each piece is placed to move water away from the chimney and into the roofing where it can flow safely to the gutters. Sealant is a supporting actor for fine details, not the star of the show. When flashing relies on caulk alone, Denver’s UV exposure and temperature swings will tell on it quickly.
How Proper Flashing Works
At its core, flashing manages water by redirecting it. Step flashing is installed with each shingle course along the chimney’s sides, creating a staircase of metal that overlaps the roofing and tucks against the chimney. Counterflashing is then installed over those steps, typically recessed into a mortar reglet cut into the masonry, and bent to cover the step flashing. The two layers form a shingle-style barrier that doesn’t ask sealant to do the heavy lifting. At the front and back of the chimney, pan flashing and saddle or cricket details handle high-flow areas, lifting water up and around the stack.
Denver’s Climate and Why It Matters
Because we live at altitude with intense sun and big temperature swings, materials fatigue faster. Wind can lift poorly anchored metal, UV breaks down exposed sealant, and freeze-thaw cycles widen small errors. That’s why attention to fastening, metal gauge, and integration with underlayments is critical. On low-slope intersections or chimneys placed low on a long roof run, water volume increases and details need to be even more robust.
Common Symptoms of Flashing Failure
Interior ceiling stains near the chimney are the obvious clue, but you may also notice subtle signs: faint lines on paint where water traveled and dried, efflorescence on exterior brick where moisture migrated, or rust streaks if metal components have been holding water. In storms, you might even hear a faint drip within the wall chase. Outside, lifted step flashing or a counterflashing line that looks smeared with sealant instead of tucked into the masonry are hints that repairs are overdue.
Repair vs. Replacement
Sometimes targeted repairs are appropriate—re-seating a loose counterflashing section into a reglet or correcting a minor integration issue with shingles. But when the system has been pieced together over time with sealant patches, full replacement is usually the most reliable option. That involves carefully removing old materials, inspecting the substrate, addressing any damaged sheathing, and installing new step flashing, pan flashing, and counterflashing that interlocks properly. The chimney’s crown and cap should be evaluated at the same time because they work together to keep water out of the structure.
Chimney Crowns, Caps, and the Bigger Picture
Even perfect flashing can be overwhelmed by a failed crown that funnels water into the top courses of brick or by a missing or undersized cap that allows rain to enter directly. A well-made crown features adequate thickness, reinforcement, slope, and overhang; a well-fitted cap keeps rain out while allowing venting. Evaluating these components in tandem with flashing gives you a holistic fix rather than a stopgap.
Flashing on Prefab Systems and Framed Chases
Factory-built systems demand a slightly different approach. Instead of masonry reglets, counterflashing integrates with siding or trim, and the chase cover at the top must be properly sloped with hemmed edges and sealed penetrations. Where the chase meets roofing, step flashing and counterflashing principles still apply, but materials and fastening methods vary with the cladding. Correctly executed, these transitions are tight and durable despite wind and temperature extremes.
Crickets and High-Flow Areas
On the uphill side of larger chimneys, water and snow accumulate. Installing a cricket—essentially a small, peaked roof—splits that flow and ushers it to the sides. In Denver’s snowstorms and spring runoff, crickets prevent ponding and ice buildup that can overwhelm even good flashing. They are especially helpful on wide stacks or where chimneys sit low on long roof planes.
Materials and Craft
Metal selection and craftsmanship go hand in hand. Properly gauged step flashing, neatly cut and bent counterflashing, and well-formed pans and saddles create a system that doesn’t need gallons of sealant to perform. Fasteners are placed to resist wind lift, and penetrations are minimized and sealed correctly. From the ground, the result looks simple, but up close you’ll see clean lines and confident bends that signal lasting work.
Coordinating with Roofing
Because flashing weaves into the roofing, the best outcomes come from teams who understand both trades. When shingles are lifted to insert step flashing and then properly lapped, the water path is preserved. Underlayment integration matters too, especially near valleys or on low slopes. The goal is to create a continuous, logical path for water so it can’t sneak behind the system.
Diagnosing Hidden Leaks
Not every flashing problem announces itself clearly. If stains appear only during wind-driven rain, the culprit may be an isolated gap on the windward side. Camera inspections of the flue, moisture meter readings, and targeted water testing can pinpoint the pathway. Systematic testing avoids the guesswork that leads to repeated callbacks.
What to Expect During the Work
On site, you’ll see protective measures for your landscaping, careful ladder placement, and methodical removal of old materials. New components are dry-fit before final installation to ensure proper overlaps and clearances. If weather shifts, the crew protects exposed areas and returns once conditions are safe. At the end, you’ll receive photos showing the sequence, from bare substrate to final counterflashing.
FAQ
How do I know if flashing is the source of my leak?
Ceiling stains near the chimney, rust lines on exterior metal, and sealant-heavy counterflashing are common clues. Targeted water testing and close inspection of step flashing transitions provide confirmation without guesswork.
Is sealant ever enough?
Sealant can fine-tune details, but it shouldn’t substitute for properly interlocked metal. In Denver’s UV and temperature swings, heavy reliance on caulk tends to fail. Good repairs emphasize metalwork that sheds water naturally.
Do I need a cricket?
If your chimney is wide or sits low on a long roof plane, a cricket helps split water and snow loads. It prevents ponding and ice buildup that can overwhelm flashing during storms and thaw cycles.
Should crowns and caps be addressed with flashing?
Yes. Crowns and caps work with flashing to keep water out. A failed crown or missing cap can defeat even excellent flashing by letting water enter from above. Evaluating all components together yields the most reliable fix.
Can flashing be repaired in winter?
Many tasks can proceed in cold weather, though safety and material constraints set the pace. Temporary protections are used if conditions prevent immediate completion, and permanent work resumes when it’s safe.
How long should a proper flashing system last?
With quality materials, correct installation, and compatible roofing, flashing is a long-term solution. Periodic checkups after major storms help catch small shifts before they become leaks.
Will the repair change my chimney’s appearance?
Proper counterflashing sits neatly in mortar reglets with clean lines, and step flashing is largely hidden by shingles. The result is a crisp, finished look that complements the roof rather than calling attention to itself.
What preparation is needed before work starts?
Clearing access around the home and noting any interior stains helps the crew plan. They’ll handle protective coverings, staging, and clean-up, keeping the site orderly throughout the project.
If you’re dealing with stains, drips, or a nagging suspicion that the roofline is the problem, there’s no need to wait for the next storm to test your patience. Reach out to a local team that treats flashing as a system and not a line of caulk. Start today by exploring trusted options for chimney repair, and give your home a leak solution built for Denver’s weather and your peace of mind.