Introduction: Why a Checklist Matters for Denver Chimneys
Denver’s combination of elevation, arid air, and sharp temperature swings makes chimneys vulnerable to unique stresses. A thorough, repeatable checklist helps you identify trouble early and prioritize fixes that keep water out, preserve structure, and support safe combustion. Use this inspection and repair roadmap each season to reduce surprises and extend the life of your chimney. If you uncover issues beyond basic maintenance, line up expert chimney repair assistance so problems do not escalate when winter arrives.
This guide organizes your work from the ground to the flue and from the exterior to interior components. You will find detailed inspection steps, pass/fail criteria, and practical repair actions suited to Denver’s freeze–thaw cycles, gusty winds, and strong UV exposure. Keep a pen and camera handy, and document your findings for future reference.
Ground-Level Scan
- Visual alignment: Check if the stack appears plumb. Any lean or bulge requires closer roof-level inspection.
- Masonry condition: Look for cracked or spalled bricks, displaced mortar, or efflorescence streaks that indicate moisture movement.
- Crown and cap overview: With binoculars, scan for cracks, ponding, or a missing/damaged cap.
- Roofline context: Note roof pitch, valleys, and obstructions that may affect wind and water flow around the chimney.
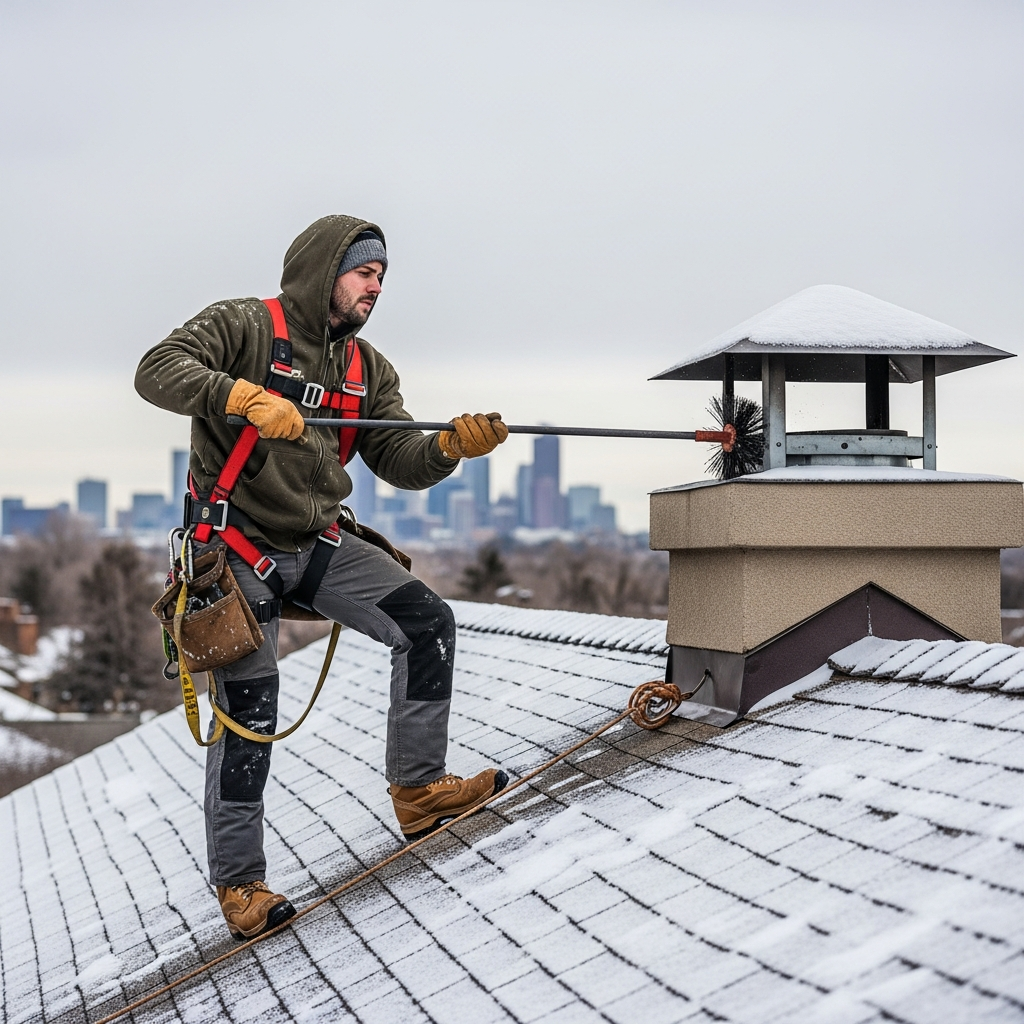
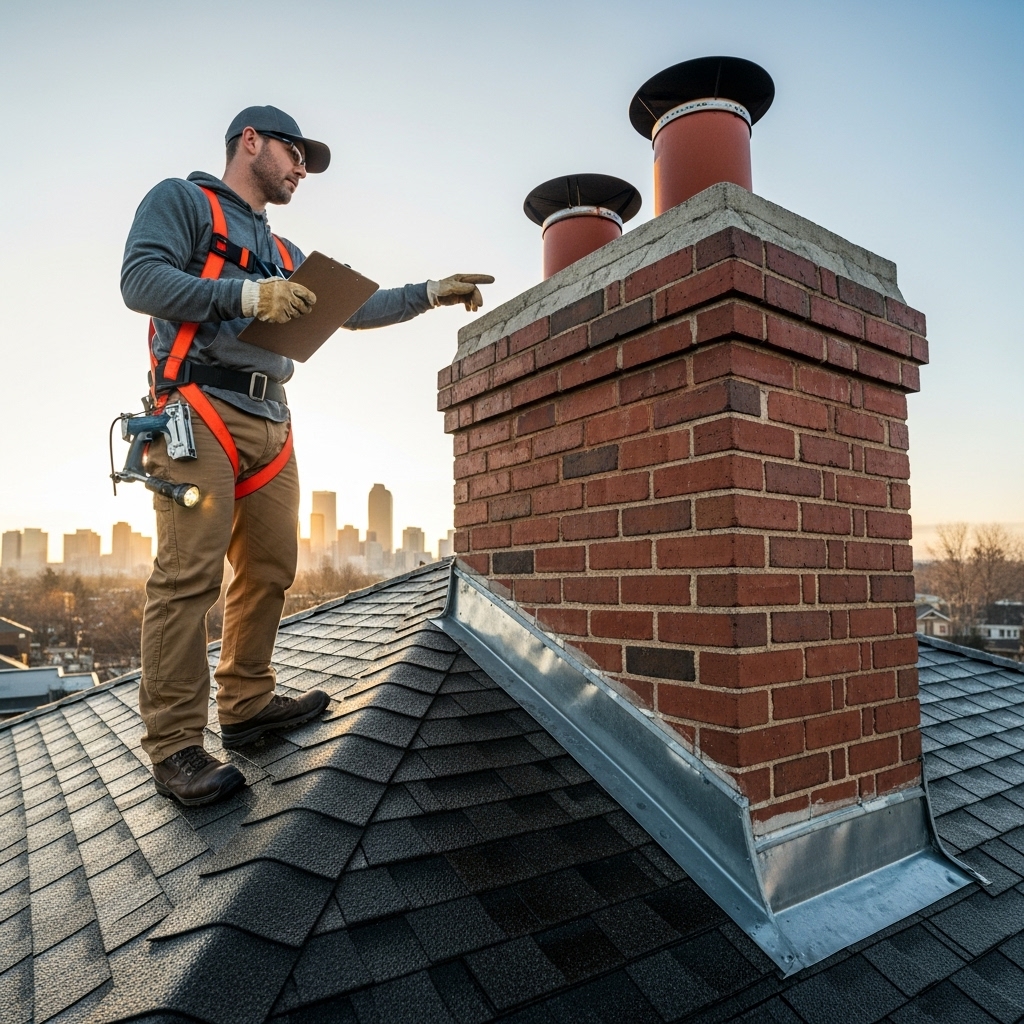
Roof-Level Exterior Checklist
- Safety setup: Confirm harness, anchor, rope length, and a stable plank. Avoid working in wind or impending storms.
- Crown assessment: Identify hairline cracks, open joints, or crumbling sections. Verify proper slope and expansion gap around the flue.
- Flue tile condition: Check for cracks, offset joints, or missing mortar between tiles at the top.
- Cap security: Ensure fasteners are tight, mesh is intact, and clearance allows free exhaust.
- Brick and mortar: Probe joints gently. Soft, sandy joints or exposed brick edges mean repointing is due.
- Flashing and counterflashing: Inspect for lifted edges, gaps, or brittle sealant. Confirm proper lapping and embedding in mortar joints.
- Chimney shoulders and saddles: On wider chimneys, verify saddle flashing directs water away effectively.
Interior and Attic Checklist
- Attic moisture: Look for staining on sheathing and rafters near the chimney. Check insulation for dampness.
- Firebox and hearth: Inspect for cracks, loose bricks, and deteriorating mortar. Test damper operation.
- Smoke chamber: Shine a light upward to evaluate parging. Rough surfaces encourage creosote accumulation.
- Odor and draft: Note musty smells or smoke spillage. Persistent odors can indicate water entry or poor draft.
Repair Action Guide
- Repointing: Rake deteriorated joints, clean, dampen lightly, and pack compatible mortar. Tool to match existing profiles for consistent water shedding.
- Crown patching: Clean and dry the crown, fill wider cracks with compatible materials, and coat with a freeze–thaw-rated product. Maintain a flexible joint at the flue.
- Flashing sealing/replacement: Seal minor gaps with elastomeric products; replace failed counterflashing by cutting a proper reglet and lapping correctly.
- Cap upgrade: Install a stainless cap sized for the flue. Verify mesh prevents wildlife entry without restricting exhaust.
- Smoke chamber parging: Smooth rough surfaces with a high-temperature, approved parge. Follow cure times carefully.
- Waterproofing: After repairs cure, apply a breathable silane/siloxane repellent to exterior masonry to reduce moisture absorption.
Denver-Specific Considerations
Rapid weather changes challenge cure times for mortars and coatings. Plan work for mornings with a stable forecast and protect fresh materials from wind and sun. Freeze–thaw damage can present as tiny chips on brick faces or hairline crown cracks that grow quickly; treat small defects promptly to avoid structural escalation. Wind exposure may require sturdier caps and diligent flashing checks.
Documentation and Rating System
Assign a severity rating to each finding: 1 for cosmetic, 2 for preventive, 3 for water risk, 4 for safety concern, and 5 for immediate hazard. Photograph each item, note the date, and record the weather. This structure helps you budget time and prioritize high-impact repairs before Denver’s first hard freeze.
Mid-Checklist Review and Decision Points
At the halfway mark—after exterior roof-level checks but before interior work—pause to evaluate scope and safety. If you have uncovered multiple crown failures, unstable bricks, or a damaged liner, adjust your plan. Complex tasks like relining or rebuilding shoulders deserve professional oversight. Reliable chimney repair guidance reduces rework and ensures code compliance, especially when dealing with gas appliances or historic masonry.
Common Mistakes and How to Avoid Them
- Overly hard mortar on soft brick, causing spalling under freeze–thaw stress.
- Rigid materials at expansion points around flue tiles.
- Skipping flashing repairs because problems are subtle from the ground.
- Applying non-breathable sealers that trap moisture in the wall.
- Working without fall protection or in gusty conditions.
Seasonal Checklist Timing
- Spring: Full inspection after snow season, plan repointing and crown work.
- Summer: Execute masonry repairs and waterproofing during stable weather windows.
- Fall: Validate repairs, clean the system, and test draft before peak use.
- Winter: Monitor performance and moisture; address emergencies with professional assistance.
Frequently Asked Questions
Q: How often should I complete this checklist? A: Perform a full review annually, plus after major storms or roof projects. Revisit critical items after the first freeze of the season.
Q: Which repairs are DIY-friendly? A: Minor repointing, crown crack sealing, cap replacement, and spot sealing of flashing. Structural instability, liner damage, and smoke chamber defects require specialized skills.
Q: Why is breathable waterproofing important? A: It reduces water entry while allowing vapor to escape, minimizing freeze–thaw stress. Non-breathable sealers can trap moisture and cause damage.
Q: What indicates a draft problem? A: Smoke spillage, lingering odors, difficulty lighting, or downdrafts during wind events. Cap design and chimney height can influence these issues.
Q: Do gas appliances change the repair approach? A: Yes. Condensates can be acidic, accelerating mortar deterioration. Liner integrity and proper venting are crucial.
Q: When should I stop and call for help? A: Any sign of structural movement, cracked liners, or smoke chamber failure warrants professional evaluation before use.
Put Your Plan into Action
Turn your findings into a step-by-step repair plan with realistic timelines and safety milestones. Tackle high-priority water and safety risks first, then move to preventive upgrades. If a task exceeds your tools or comfort, bring in a local expert and schedule dependable chimney repair to secure your home for the season.