Introduction: Why a Step-by-Step Inspection Matters
Chimneys work out of sight, but their performance affects safety, indoor air quality, and roof durability. A structured inspection process helps you detect small problems before they grow. In Denver, altitude, sun intensity, and freeze–thaw cycles demand careful attention to crowns, caps, liners, and flashing. This guide walks you through an orderly, repeatable sequence you can follow or use to understand professional reports. If at any stage you prefer expert help, coordinating with local specialists in chimney repair ensures that findings are interpreted through the lens of Front Range weather.
Preparation: Safety, Tools, and Scope
Decide on the inspection level: basic visual review, detailed rooftop check, or inside-the-flue examination. For homeowners, a basic visual and rooftop review is usually appropriate. Assemble a sturdy ladder, gloves, eye protection, a flashlight, a mirror, a camera or smartphone, and a notepad. Choose a calm, dry day; gusty winds common in Denver can make rooftop work unsafe. Confirm the fireplace is cold and ashes are removed. Keep a helper on the ground to stabilize the ladder and to assist.
Exterior Ground-Level Survey
Start by circling the house. Look for leaning, step cracking in the masonry, missing bricks, efflorescence, or staining beneath the crown. Use binoculars to inspect the cap, crown edges, and flashing lines without climbing yet. From this vantage point, note roof damage adjacent to the chimney and any tree branches that may contact the structure. Indoors, scan ceilings near the chimney for water marks.
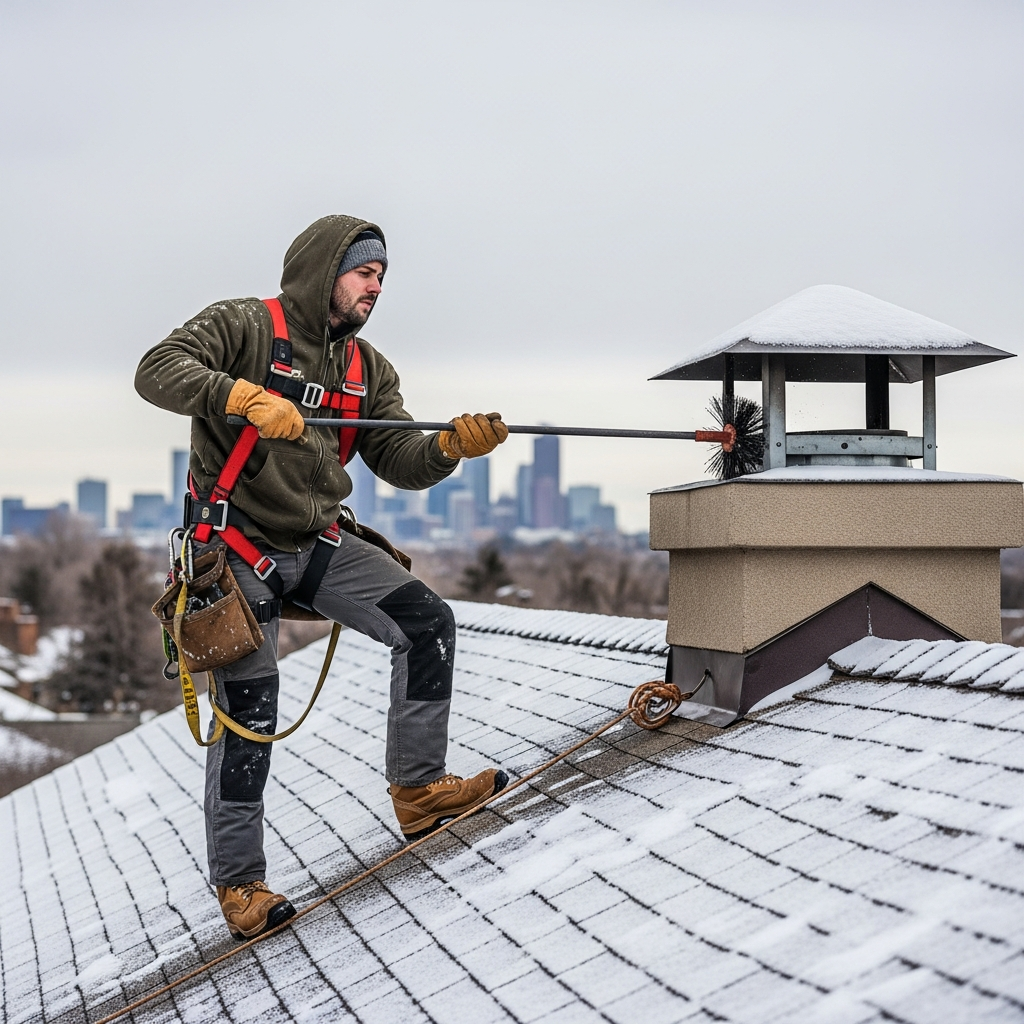
Roof Access and Perimeter Safety
Once you verify conditions are safe, ascend carefully. Establish a secure stance with three points of contact. Avoid stepping on brittle shingles in extreme heat or cold. Survey the immediate area for tripping hazards, then approach the chimney. Never stand on the crown; work from the roof surface.
Topside Inspection: Crown and Cap
Examine the crown closely for hairline cracks, open joints at the flue tile, or evidence of ponding. Small cracks can be addressed with crown coatings; wide fractures or rebar exposure require professional repair. Evaluate slope; water should shed away from the flue. Next, check the cap. Confirm that fasteners are tight, mesh is intact, and the hood is level. Look for rust or corrosion, especially after hail or wet winters. If the cap is missing or heavily damaged, note replacement as a priority item.
Flue Opening and Liner Observations
With the cap lifted or removed briefly, look down the flue using a mirror and flashlight. You are checking for heavy creosote, cracked clay tiles, gaps, or offsets. Do not drop tools into the flue. Light surface creosote suggests sweeping is needed; significant glaze or tile fractures warrant a professional Level 2 or Level 3 inspection with video scanning. At Denver’s elevation, draft can be more sensitive to obstructions; even partial blockages can cause smoke roll-out.
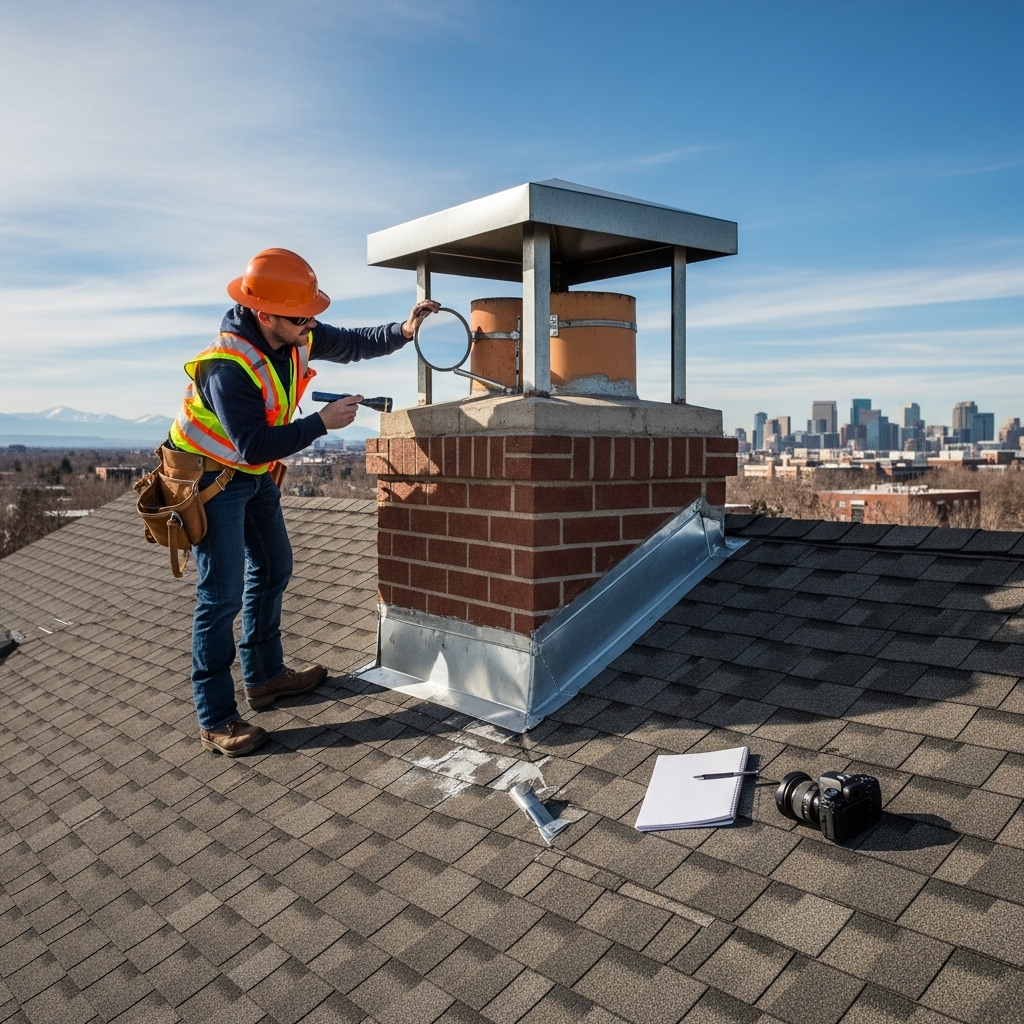
Chimney Stack and Masonry
Inspect bricks for spalling, scaling, or loose faces. Probe mortar joints gently with a plastic tool; if grains release easily, repointing may be in order. Note any step cracking, which can reveal settling. Observe for white mineral deposits; persistent efflorescence usually indicates water entry through the crown, cap, or flashing.
Flashing and Roof Interface
Study the step flashing along shingle courses and the counterflashing embedded in mortar joints. Look for lifted edges, cracked sealant, or rust. Behind wide chimneys, ensure a cricket or saddle channels water away efficiently. If you see repeated sealant failure, suspect an underlying metal or integration problem rather than a simple caulk issue.
Firebox, Damper, and Smoke Chamber
Return indoors and open the damper. Shine a light up into the smoke chamber. Look for soot buildup, parging integrity, and visible cracks. Operate the damper to ensure it opens fully and closes snugly. Examine the firebox for loose bricks, gaps, and deteriorated refractory panels. Any component compromised by heat or age can undermine performance and safety.
Draft and Airflow Checks
On a cool morning, roll a small piece of newspaper and light it to observe smoke flow. Smoke should travel steadily up the flue without spilling into the room. If it stalls, consider cold flue conditions, competing exhaust fans, or obstructions. In Denver’s dry climate, a brief preheat of the flue often resolves early-season sluggish draft.
Moisture Tracking and Attic Clues
Access the attic if possible and inspect the area around the chimney penetration. Look for darkened sheathing, rust on nails, or moldy smells. Moisture marks that radiate from the chimney usually point to flashing issues, while stains centered on the stack may indicate crown or cap leaks.
Mid-Process Evaluation and Light Maintenance
After documenting findings, perform light maintenance if you are prepared. Clear debris from the cap mesh, tighten loose fasteners, and apply small beads of UV-tolerant sealant to minor flashing gaps. Schedule sweeping if you observed notable soot. If you identified cracked tiles, structural movement, or persistent moisture, do not proceed with use until a pro evaluates the system.
When your notes raise questions, reach out to a local team experienced in chimney repair. A quick consultation can help you prioritize repairs, distinguish cosmetic issues from safety concerns, and plan work in the best seasonal window for Denver weather.
Reporting: Build a Clear Record
Organize your photos by component: crown, cap, flue, masonry joints, flashing, firebox, and attic penetration. Write brief captions with date, weather conditions, and observations. Over time, this record helps you track patterns, make warranty claims after hail, and communicate effectively with contractors.
Common Issues and What They Mean
Hairline crown cracks: Usually manageable with a crown sealer if no deep movement is present. Efflorescence: Indicates moisture migration; investigate crown, cap, and flashing. Loose counterflashing: Suggests sealant aging or improper insertion depth. Thin creosote: Normal with use, but schedule sweeping before the season. Tile gaps or fractures: Potentially serious; call for a Level 2 inspection with video.
Frequently Asked Questions
How often should I perform a step-by-step inspection? Conduct a basic inspection twice a year, with a comprehensive review before the heating season. Schedule professional sweeping and inspection annually.
Do I need special tools for liner inspection? A mirror and flashlight provide a preliminary view, but detailed assessments require professional cameras and trained interpretation.
What if wind makes inspection unsafe? Postpone. Denver’s gusts are unpredictable, and safety beats speed. Choose calm, dry conditions.
Can I use generic roof caulk on flashing? Use products rated for UV exposure and metal-to-masonry adherence. The wrong sealant may fail rapidly in sun and temperature swings.
Is a cap optional? No. Caps keep out water, animals, and embers. They are a core component of a reliable system.
Why does smoke sometimes enter the room at startup? Cold flues, strong exhaust fans, or partial blockages can cause rollback. Preheating the flue and verifying cap mesh cleanliness helps.
From Findings to Action
A disciplined inspection turns unknowns into a clear action plan. Whether you complete minor maintenance yourself or schedule professional work, use your report to prioritize safety-critical items first. When you want local insight and carefully sequenced repairs, coordinate with Denver-focused experts in chimney repair to keep your system safe, dry, and draft-ready all year.