When the first cold front sweeps down from the Rockies and the city wakes to a glitter of frost, Denver’s chimneys begin their busiest season. Fireplaces glow again, furnaces cycle longer, and the freeze-thaw rhythm sets in on every exposed brick, crown, and metal seam. Winter is both a test and a teacher; it reveals weaknesses in a chimney faster than any other time of year. Taking a deliberate approach to chimney repair before and during the cold months keeps the warmth in and the water out, turning the season from a source of stress into a stretch of comfort.
Ice and snow don’t just sit on a chimney—they work on it. Melting during the day and refreezing at night, water expands into hairline cracks and pries them wider. Wind-driven snow finds the smallest gaps around flashing and settles there until a sunny hour sends a trickle inward. Inside the flue, cold surfaces can condense moisture if a cap is missing or poorly designed, and that dampness interacts with soot to create corrosive conditions. The end result can be a leak in the living room, a musty odor that lingers, or a draft problem that turns a fire into smoke.
Understanding Winter’s Effects on Masonry and Metal
Brick is tough, but it is not invulnerable. Each unit has a facing harder than its core. When that face is weakened by time or impact, water gets a foothold and freeze-thaw cycling begins to exfoliate the surface. Mortar joints, especially those already worn thin, open more quickly in winter as absorbed water expands. Crowns—those concrete or mortar tops that shed water—are especially vulnerable to hairline cracking. A small fracture in October becomes a spiderweb by February if ignored. Metal parts have their own choreography: flashing can flex and fatigue in temperature swings, sealants lose elasticity, and caps rattle awake under gusts that carry snow like sand.
Gas appliances produce milder, steadier exhaust than wood fires but can still contribute to winter wear. Their flue gases contain moisture that condenses readily on cold surfaces. If that moisture has a chance to freeze near the top, it can push against seams or create icicles that redirect meltwater onto the crown. The system only works as well as its top, and Denver’s winter makes that top earn its keep.
Pre-Winter Inspections: The Best Insurance You Can Buy
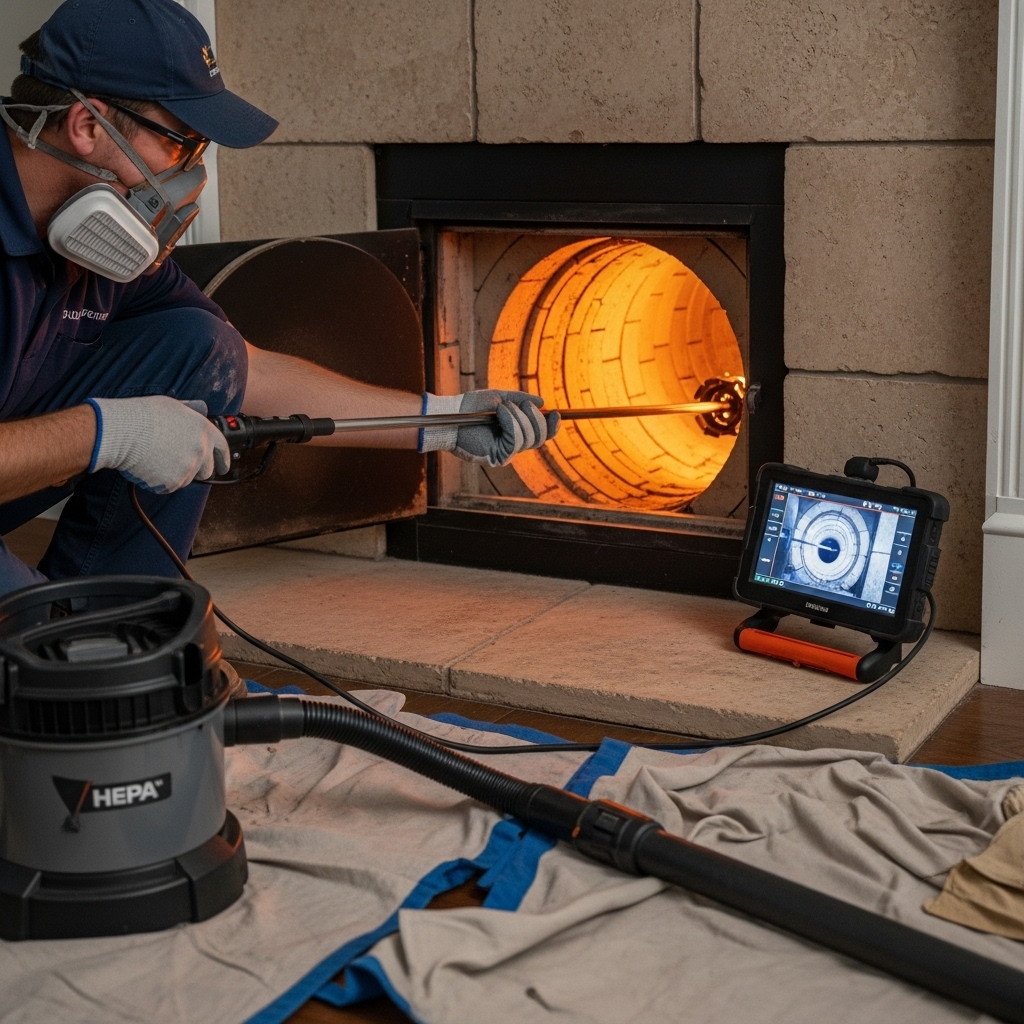
A thorough inspection in the shoulder season is the single most effective step you can take. We look closely at the crown, chasing down hairlines with a bright light and a tap test that reveals delamination. Mortar joints on windward and north faces often show the first signs of wear, so we note gaps and soft areas for repointing. Brick faces are checked for spalling, and any loose units are flagged for stabilization or replacement. The cap is examined for square seating, intact mesh, and a lid height that clears the flue tile adequately for airflow and snow shedding.
At the roofline, flashing is verified step by step. Counterflashing should tuck cleanly into joints or a reglet, overlapping step flashing with enough bite to resist wind. Sealants, if present, should be flexible and free of fissures. Inside, the firebox and smoke chamber are inspected, and the damper is tested for smooth movement. If soot accumulation suggests heavy prior use, a cleaning before winter reduces odors and improves draft, particularly on the first cold starts of the season.
Strategic Repairs That Pay Off in Winter
Small, targeted repairs have outsized impact between November and March. Rebuilding or resurfacing a crown with a slight slope and a crisp drip edge keeps meltwater moving off the chimney rather than into it. Tuckpointing key joints closes pathways for water and locks bricks in place before freeze-thaw cycles can wedge the masonry apart. Where flashing looks tired, we renew the integration—setting counterflashing with clean, watertight lines and verifying that shingles or roofing adjacent to the chimney are secure.
For flues with worn or missing caps, a robust, properly sized stainless cap is the quiet hero of winter. It sheds snow, blocks driven rain, and stabilizes draft on gusty nights. On wood-burning systems, accessible mesh and removable lids make mid-season cleaning easy if needed. For gas systems, cap and mesh selection must respect the lower-pressure exhaust; we confirm compatibility so that safety devices don’t trip on cold days when you need heat most.
Working in Cold Weather: Methods and Timing
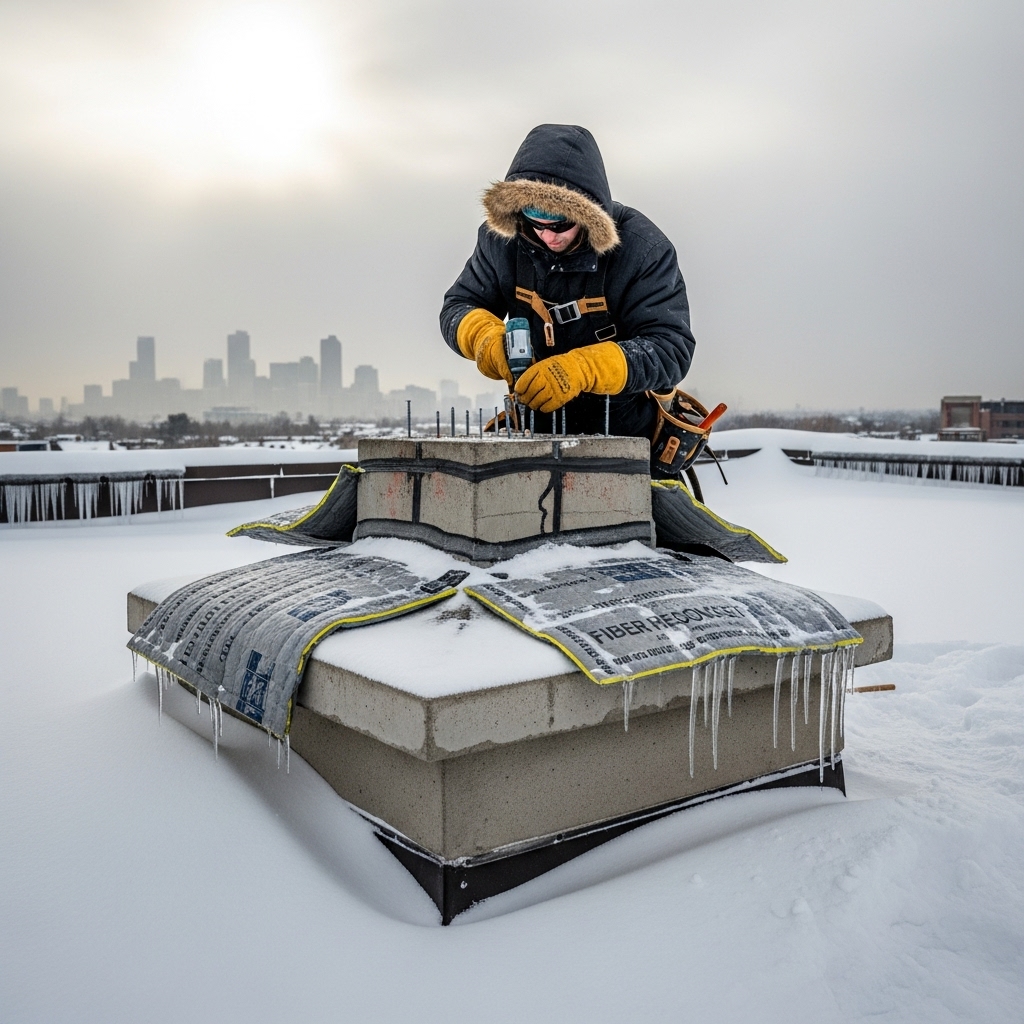
Repairing masonry in winter requires respect for chemistry and temperature. Mortar and crown mixes need proper curing conditions. We stage work during mild spells when daytime highs and nighttime lows fall within safe ranges, and we use insulating blankets and wind breaks to hold temperatures where needed. Certain admixtures can accelerate set times, but we use them judiciously to protect the long-term strength and permeability of the repair. The aim is to deliver a durable result, not a quick patch that will pop when January turns sharp.
Some tasks adapt well to cold: cap installations, flashing improvements, damper replacements, and flue camera inspections can proceed through most of the season. Others, like extensive tuckpointing or full crown rebuilds, benefit from a weather window. We sequence projects so temporary protections can bridge the gap—keeping your chimney safe until the perfect day arrives for the longer-lasting work.
Ice Dams Around Chimneys: Causes and Cures
Ice dams aren’t just an eave problem. Chimneys interrupt the smooth plane of a roof, and snow tends to pile on the uphill side. Warm air from the house can leak around the chimney chase, warming the roof deck and melting snow from beneath. That meltwater refreezes as it meets colder shingles, forming a ridge that traps subsequent melt. The result can be water pushed up and under shingles or against flashing where it finds even the smallest gap.
Prevention is a blend of insulation, ventilation, and smart roofing details. Ensuring that attic insulation is continuous up to the chimney while maintaining required clearances keeps heat where it belongs. A properly sized and flashed cricket on the uphill side of wider chimneys splits the snow load and channels water around the structure. We verify that the cricket integrates with shingles and flashing cleanly so it does its quiet work when storms arrive.
De-Icing and What Not to Do
When ice does form, it’s tempting to reach for rock salt or vigorous scraping. Both are bad ideas on a roof and worse near a chimney. Salt accelerates corrosion on metal and damages masonry; scraping risks tearing shingles or dislodging flashing. If intervention is needed, we use gentle, roof-safe de-icing products sparingly and, more often, we focus on opening pathways for meltwater to escape without pooling. Heat cables near chimneys can help in stubborn spots, but they must be installed thoughtfully to avoid creating new problems where wires cross flashing or crown edges.
Inside the home, watch for telltales. Water stains on ceilings near a chimney, a damp odor after a thaw, or a faint white crust forming on brick faces are early warnings of moisture migration. The sooner those signs are investigated, the easier the fix tends to be.
Draft, Odors, and Winter Comfort
Cold air is dense and can pool in flues that sit on the windward side of a house. If your first fire of the season tends to smoke, pre-warming the flue with a few twisted sheets of newspaper or a heat source designed for the purpose can reverse a cold plug. A good cap reduces downdrafts, and a tight damper keeps cold air at bay when the fireplace is idle. Clean flues smell less, because soot absorbs and then releases moisture odors. A simple cleaning ahead of winter can make an outsized difference in both draft and aroma.
Gas fireplaces and inserts are often touted as set-and-forget, but their venting deserves the same winter attention. We verify that terminations are clear, caps are secure, and that the system drafts within specifications so that sensors don’t shut down heat on the coldest night of the month.
Midwinter Check-ins: Small Habits, Big Returns
A quick midseason look pays dividends. After a heavy snow or wind event, a glance from the ground can reveal a cocked cap lid or a sliding snow drift against a chimney face. Inside, listen for rattles on gusty nights and sniff for damp smells after a sunny thaw. These small checks are not chores so much as peace-of-mind rituals, and they often catch issues when they are inexpensive in effort and time to correct.
In the middle of winter, homeowners sometimes ask whether it’s worth addressing a cap or flashing issue now rather than waiting until spring. If water has a path inward, the answer is yes. Timely fixes and temporary protections hold the line against freeze-thaw damage, and they set you up for a clean handoff to any larger work when the weather softens. That’s the practical mindset behind winter-ready chimney repair: act early, act smart, and let the season teach you where to focus.
Frequently Asked Questions About Winter Chimney Care
Can you repoint mortar joints in freezing temperatures?
It’s possible with the right conditions and protections, but not ideal. Mortar needs controlled temperatures to cure properly. We aim for mild spells, use insulating blankets, and, when appropriate, accelerators to ensure durable results. If the forecast turns harsh, we may stabilize and return for full repointing in better weather.
How do I prevent ice dams around my chimney?
Combine proper attic insulation with maintained clearances around the chimney, strong ventilation, and a well-integrated cricket on the uphill side for wider chimneys. Tight, correctly layered flashing is essential so that meltwater can’t find a gap to exploit.
Is white staining on my chimney a winter issue?
Often, yes. White efflorescence indicates moisture moving through masonry and depositing salts on the surface. It’s a symptom, not the cause. We trace the moisture path, address the source—often crown or flashing related—and clean the surface gently to preserve the brick face.
Can I use my fireplace if I suspect a small leak?
It’s best to pause and get an inspection. Water and combustion byproducts don’t mix well, and damp conditions can accelerate damage or affect draft. A quick check can confirm whether temporary protections or minor repairs will solve the issue safely.
When is the best time to install or replace a chimney cap?
Any time the roof is safe to access, but before winter is ideal. A good cap protects against snow, driven rain, and wildlife, and it stabilizes draft in gusty weather. In midwinter, cap work can still proceed in most conditions.
How do I keep cold air from falling down the flue when the fireplace isn’t in use?
A tight, well-seated damper and a properly sized cap help. In some cases, a top-seal damper provides a better air seal, reducing cold drafts and energy loss without changing the fireplace’s character.
Do metal chimneys need winter attention too?
Absolutely. Factory-built systems rely on intact terminations and storm collars. Snow loads and ice can stress those parts, and wind can loosen fasteners. A quick seasonal check keeps them performing safely.
If winter has already put your chimney to the test or you’d rather get ahead of the curve, we’re ready to help. From pre-season inspections to midwinter fixes and spring follow-through, our approach is built around Denver’s weather and your home’s rhythm. When you want warmth without worry, schedule comprehensive chimney repair and let the cold months be a time to enjoy the fire, not fret over the roofline.