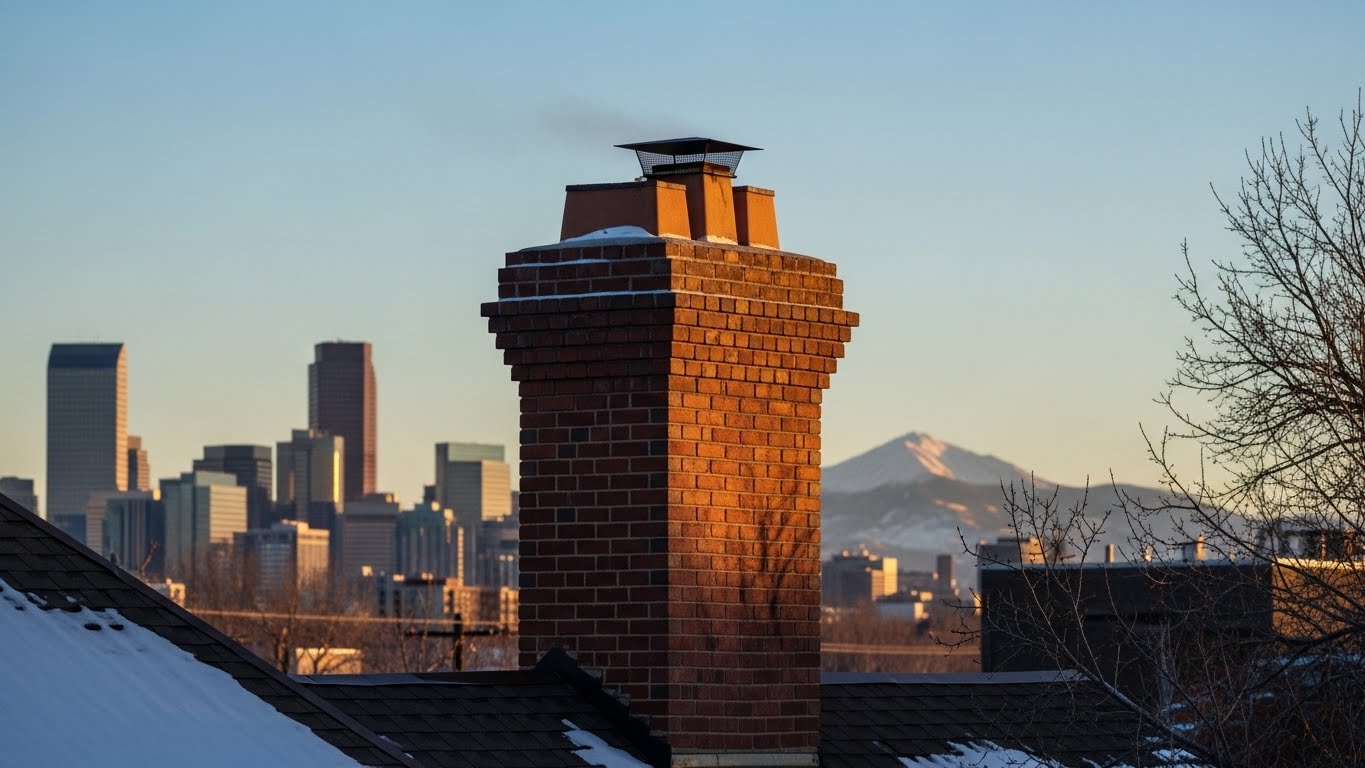
Clean, efficient fireplaces are a hallmark of cozy living in Denver, where crisp winter nights and cool shoulder seasons make a crackling fire feel like home. Yet a safe fireplace begins with a clean, well-maintained chimney. This comprehensive cleaning guide explains how your chimney works, why regular maintenance matters in the Front Range climate, and how to approach a thorough clean from preparation to post-cleaning checks. It also covers when to do it yourself and when to call a professional, how to avoid common pitfalls, and the exact steps to keep creosote at bay. If you prefer a professional from the start, consider scheduling a trusted chimney sweep before peak burning season so your system is ready when temperatures drop.
Denver homeowners face unique chimney challenges: higher altitude air, lower humidity in winter, sudden temperature swings, and occasional heavy snow. These conditions can influence how wood burns and how creosote accumulates. Understanding your chimney’s anatomy, the mechanics of combustion, and the nature of creosote deposits will help you keep your fireplace safe and efficient all season long.
How Your Chimney Works in Simple Terms
When you build a fire, heat warms the air inside the firebox. Warm air rises through the flue and carries combustion byproducts—smoke, water vapor, unburned gases—toward the top. The pressure difference between indoor and outdoor air creates draft, which draws fresh air into the fire and exhausts smoke out of the home. Good draft keeps smoke out of your living room and helps wood burn more completely, reducing creosote formation.
Several parts must function together: the firebox (where the fire burns), the damper (which regulates airflow), the smoke chamber (where hot gases compress and accelerate), the flue or liner (the inner passage venting gases), and the cap and crown (which keep out rain, snow, and animals). If any section is blocked or deteriorated, draft suffers and creosote buildup accelerates.
Why Chimney Cleaning Matters in Denver
Creosote is a highly flammable byproduct of combustion that condenses on cool inner walls of the flue. Denver’s cold evenings can cause the flue to cool quickly, especially when fires are started in a cold chimney. Frequent short fires, unseasoned wood, and reduced airflow from a partially closed damper all increase creosote. Left unaddressed, creosote restricts draft, produces odors, and can become a fire hazard.
Denver’s freeze–thaw cycles also affect masonry. Moisture can intrude through a damaged crown, cracked cap, or compromised mortar joints. Over time, this can cause spalling bricks, deteriorated mortar, or rusted components. Cleaning the flue gives you a clear view to identify such damage before it worsens.
Choosing the Right Fuel
Use seasoned hardwood with a moisture content below typical green wood levels, dried for an adequate period in a well-ventilated stack. Dry wood burns hotter and cleaner, reducing creosote. Softwoods ignite quickly but can increase residue if not fully seasoned. Avoid burning trash, glossy paper, or painted/treated lumber; these produce corrosive byproducts and excessive soot.
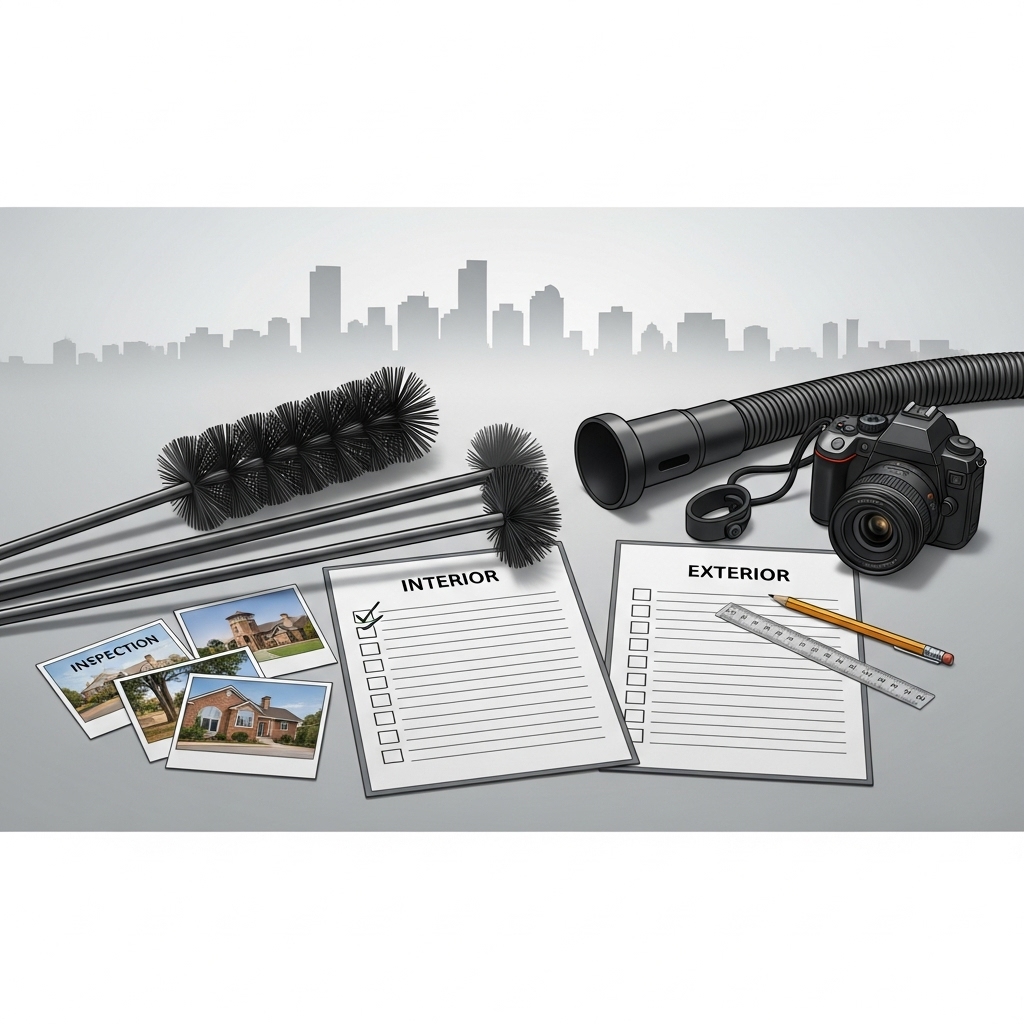
Preparation Checklist Before You Clean
- Confirm that the fireplace and chimney are completely cool. Wait at least a full day after your last fire.
- Lay down drop cloths to protect flooring and furniture around the hearth. Tape them to prevent movement.
- Wear eye protection, gloves, and a dust mask or respirator rated for fine particulates.
- Close doors to other rooms if possible, and open a nearby window slightly to equalize pressure.
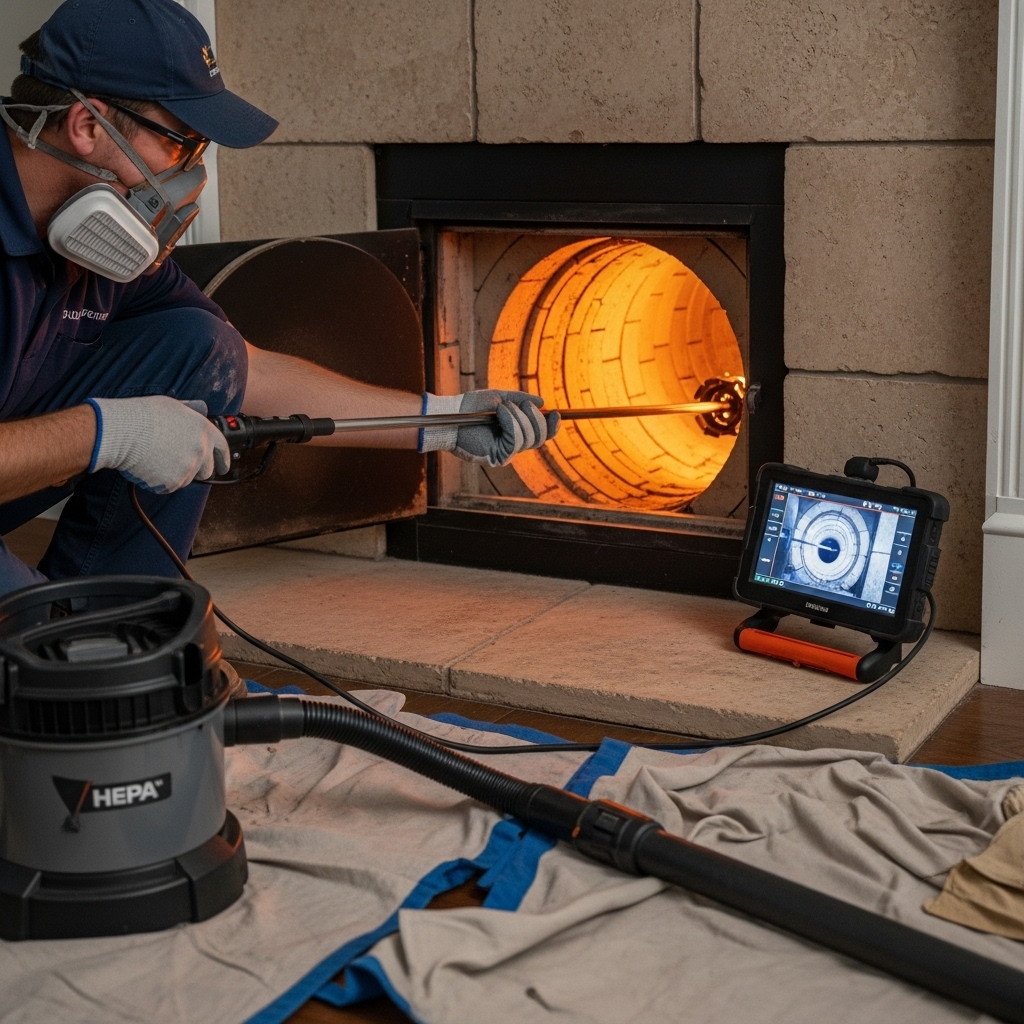
- Gather tools: chimney brushes sized to your flue (poly for metal liners, wire for masonry), flexible rods, a small stiff brush for the smoke shelf, a shop vacuum with a HEPA filter, a flashlight/headlamp, and a bucket.
- Check your ladder for stability if you plan to clean from the roof. Avoid roof work in snow, ice, or high winds common in Denver winters.
Top-Down vs. Bottom-Up Cleaning
There are two primary approaches. Top-down cleaning starts at the chimney cap and pushes debris downward to the firebox. It offers excellent control and visibility of the flue’s condition from above. Bottom-up cleaning begins in the firebox, pushing debris upward and then down again as you work each section. Both work; choose based on your access, comfort with roof work, and chimney height.
Step-by-Step Chimney Cleaning Process
- Protect the area. Seal the fireplace opening with plastic or use a fitted barrier, leaving a small access slot for rods. Even with a HEPA vacuum, soot can spread quickly indoors without containment.
- Open the damper fully and inspect with a flashlight. Note any obvious obstructions, cracked tiles, or heavy glaze (shiny creosote). Thick, glazed creosote requires specialized tools and should be addressed by a professional.
- Brush the flue in sections. For top-down, remove the cap and feed the first rod into the flue with the brush attached. Scrub each section thoroughly, adding rods as you descend. For bottom-up, attach the brush in the firebox and push upward, working slowly in overlapping strokes.
- Scrub the smoke chamber and smoke shelf. Use a smaller brush to reach corners. The smoke shelf commonly traps soot, leaves, and nests; remove all debris.
- Vacuum carefully. Use a HEPA-filtered shop vac to collect loose soot from the firebox, shelf, and surrounding area. Move slowly to avoid stirring dust.
- Clean the firebox walls. Remove loose mortar debris or refractory panel fragments. If refractory panels are damaged or cracked through, plan on repair or replacement.
- Inspect the damper operation. It should open and close smoothly and seat firmly. Surface rust is common; heavy corrosion or broken parts require service.
- Check the cap and crown. From the roof, confirm the cap is secured, the screen is intact, and the crown has no major cracks or gaps. Small surface cracks can allow water intrusion; note issues for repair.
- Document what you find. Photos help you track changes and share with a technician if needed. Note any odors, draft problems, or persistent stains.
- Dispose of ash properly. Store cold ash in a metal container with a tight lid, outdoors on a non-combustible surface.
Recognizing Types of Creosote
Creosote forms in stages. Loose, flaky soot (Stage 1) is easiest to remove. Heavier, crunchy deposits (Stage 2) take more effort but still respond to stiff brushing. Shiny, hardened glaze (Stage 3) is highly combustible and may require professional mechanical removal. If you see tar-like sheen, unusual resistance to brushing, or a strong acrid odor, postpone use and seek expert help.
Draft Troubleshooting Tips
- Prime a cold flue by holding a rolled newspaper or kindling flame near the damper for a few minutes before starting a fire.
- Crack a nearby window slightly if your home is tightly sealed and negative pressure competes with the chimney’s draft.
- Check for obstructions at the cap—screens clogged with soot or animal nests are common causes of weak draft.
- Consider how new appliances (exhaust fans, dryers) affect household airflow; they can pull air away from the fireplace.
Special Considerations for Gas Fireplaces
Many Denver homes include gas inserts or gas log sets. Even though gas burns cleaner than wood, vents still require inspection and cleaning. Dust, pet hair, or small debris can obstruct air passages. Glass fronts can develop a white film from mineral deposits, and log placement must match the manufacturer’s specifications to avoid soot. Shut off gas before any cleaning, and follow the manual closely. If you smell gas or see scorch marks, stop and contact a professional immediately.
Common DIY Mistakes to Avoid
- Using the wrong brush for your liner type, which can scratch or damage it.
- Skipping containment, leading to soot spread throughout the house.
- Ignoring glazed creosote. Brushing alone will not remove it safely.
- Neglecting the smoke chamber and shelf. These areas trap significant debris.
- Overlooking the cap. A missing or damaged cap invites water, snow, and animals.
DIY or Professional Cleaning?
If you are comfortable on ladders, have proper protective equipment, and your chimney has light, powdery soot, a careful DIY cleaning may be sufficient. However, tall roofs, steep pitches, heavy creosote, or any signs of damage call for professional help. A trained technician can identify subtle hazards—like a cracked flue tile or a deteriorated crown—that are easy to miss. If you are unsure, schedule a mid-season or pre-winter chimney sweep and ask for a written report and photos.
Post-Cleaning Checks
- Light a small, hot fire and observe the draft. Smoke should rise quickly without spilling into the room.
- Listen for unusual noises at the cap (fluttering indicates birds or loose screen components).
- Monitor odors. Persistent creosote smell may indicate hidden deposits or moisture intrusion.
- Check surrounding walls and ceilings for smoke stains that could signal leakage.
Seasonal Maintenance Timeline for Denver Homes
Late summer to early fall is ideal for a full cleaning and inspection, leaving time for repairs before cold weather. During peak burning months, periodically remove ash, check the damper, and look for soot accumulating on the cap screen. At season’s end, clean the firebox, store tools, and verify the cap is secure before spring storms arrive. Keep a simple log of firing frequency and any issues; it will help you plan maintenance proactively.
Eco and Home Health Considerations
Reducing creosote improves indoor air quality by lowering the chance of smoke backdrafting. Burn small, hot fires rather than large, smoldering ones. Keep doors between the fireplace room and bedrooms closed while starting fires to minimize odor migration. Dispose of ash responsibly and avoid placing it near garden beds until it is fully cold; embers can stay hot longer than expected.
Frequently Asked Questions
Q: How often should a chimney be cleaned in Denver?
A: Frequency depends on use and fuel. Homes with regular winter fires should plan on annual cleaning and inspection. If you burn only occasionally, inspect yearly and clean as needed based on soot accumulation.
Q: Can I skip cleaning if I only have a few fires each year?
A: Even light use can lead to bird nests, windblown debris, or moisture damage. Annual inspections catch problems early, and cleaning is recommended whenever soot or blockages are present.
Q: What are signs I should stop using the fireplace until it is cleaned?
A: Strong smoke odor, visible soot falling into the firebox, poor draft, ticking or crackling sounds in the flue, or a damper that will not fully open are all reasons to pause and clean or call a professional.
Q: Does Denver’s altitude affect chimney performance?
A: Yes. Lower air density can change draft characteristics. Chimneys may require careful fire-starting techniques and consistent maintenance to maintain strong, clean airflow.
Q: What type of brush should I use?
A: Use poly brushes for metal liners and wire brushes for clay tile masonry flues. Measure the flue’s inner dimensions to choose the correct size so the brush contacts all surfaces.
Q: Is a chimney cap necessary?
A: A good cap with a spark screen helps keep out rain, snow, and animals, protects from embers, and reduces downdrafts. It is a critical part of the system, especially with Denver’s wind and winter precipitation.
Ready for a Safer, Cleaner Fireplace?
If you want peace of mind before the next cold snap, or if your DIY checklist raised concerns, bring in local expertise. A professional can verify your chimney is clear, your cap and crown are sound, and your damper and liner are functioning properly. Make your home ready for another season of comfortable fires by booking a trusted chimney sweep today.